[LAMP] How to install Apache on windows system

Apache is a popular platform to establish website on your local machine. In this tutorial, we are going to demonstrate how to setup Apache 2.4 on Windows 7 system.

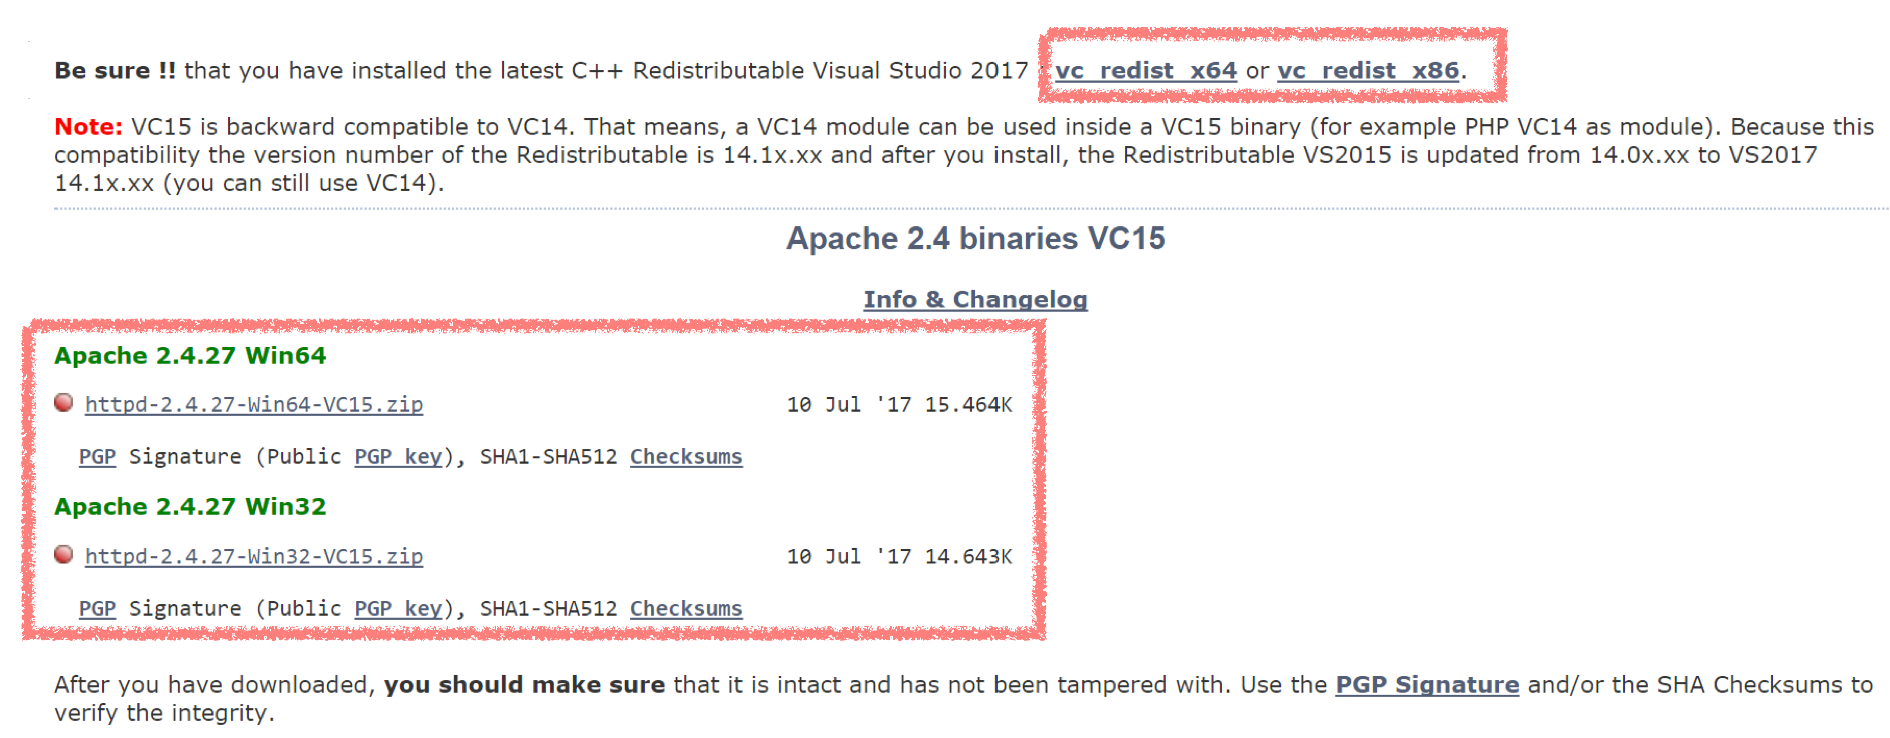
First, Go to the Apache Lounge website
enter image description here

Download both:
1. the latest C++ Redistributable Visual Studio 2017 and
2. Apache *.zip
files for your operation system
(For me is Win64 version)

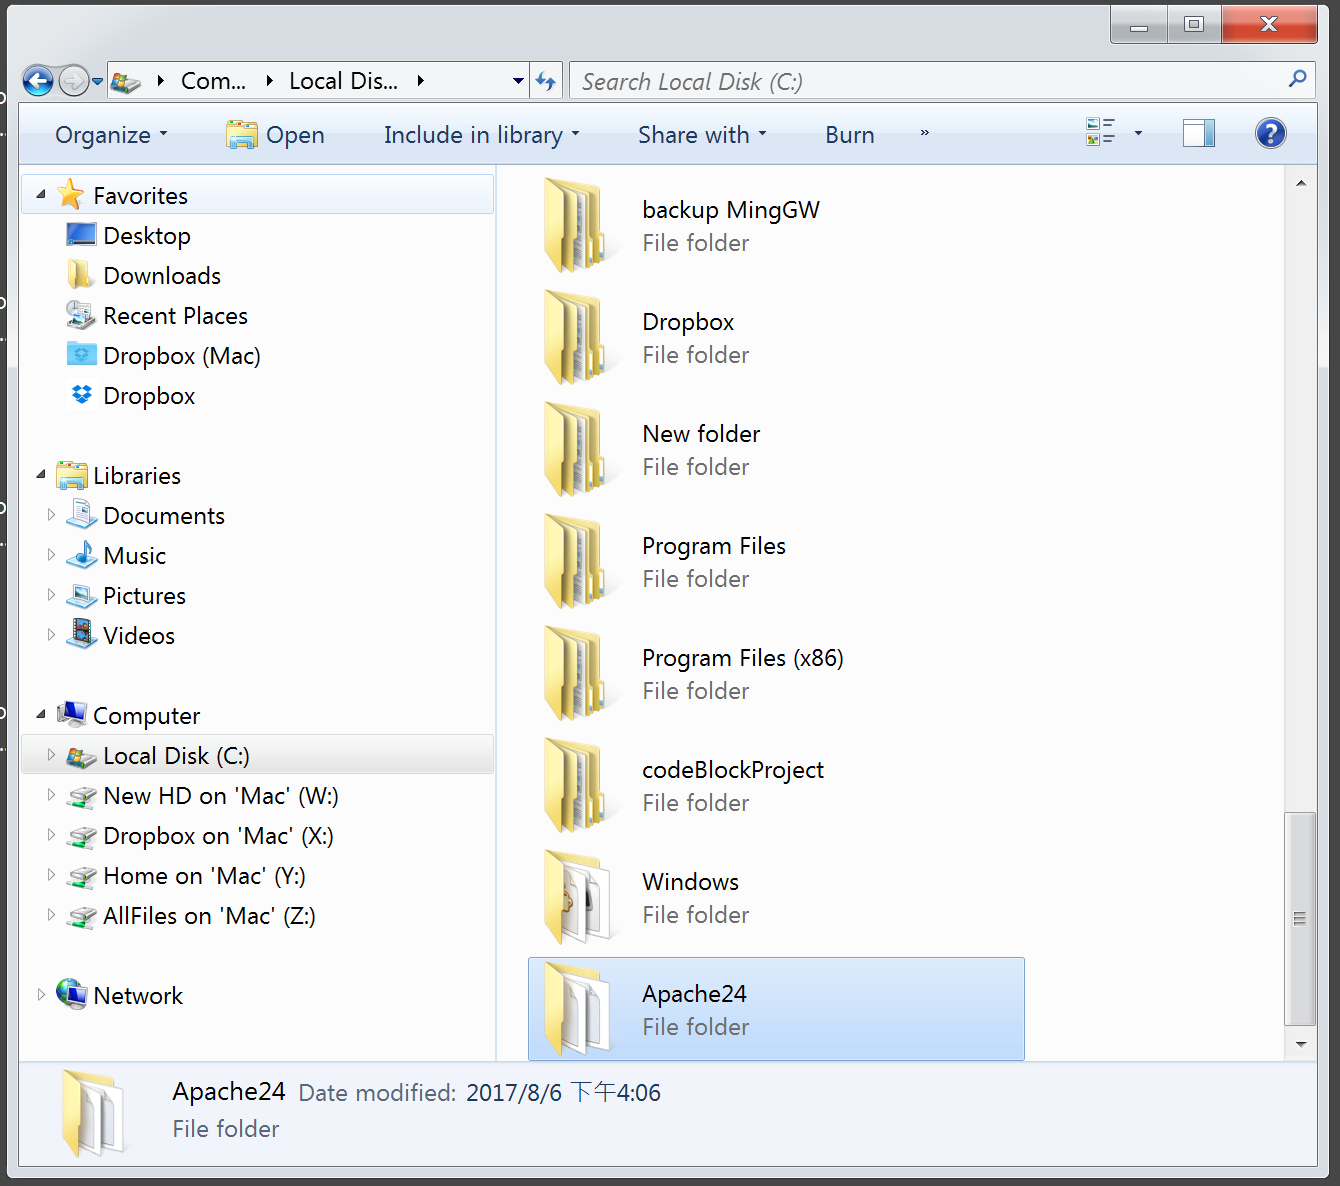
Unzip the file after downloaded and put the Apache24 folder to the location of C:\
enter image description here

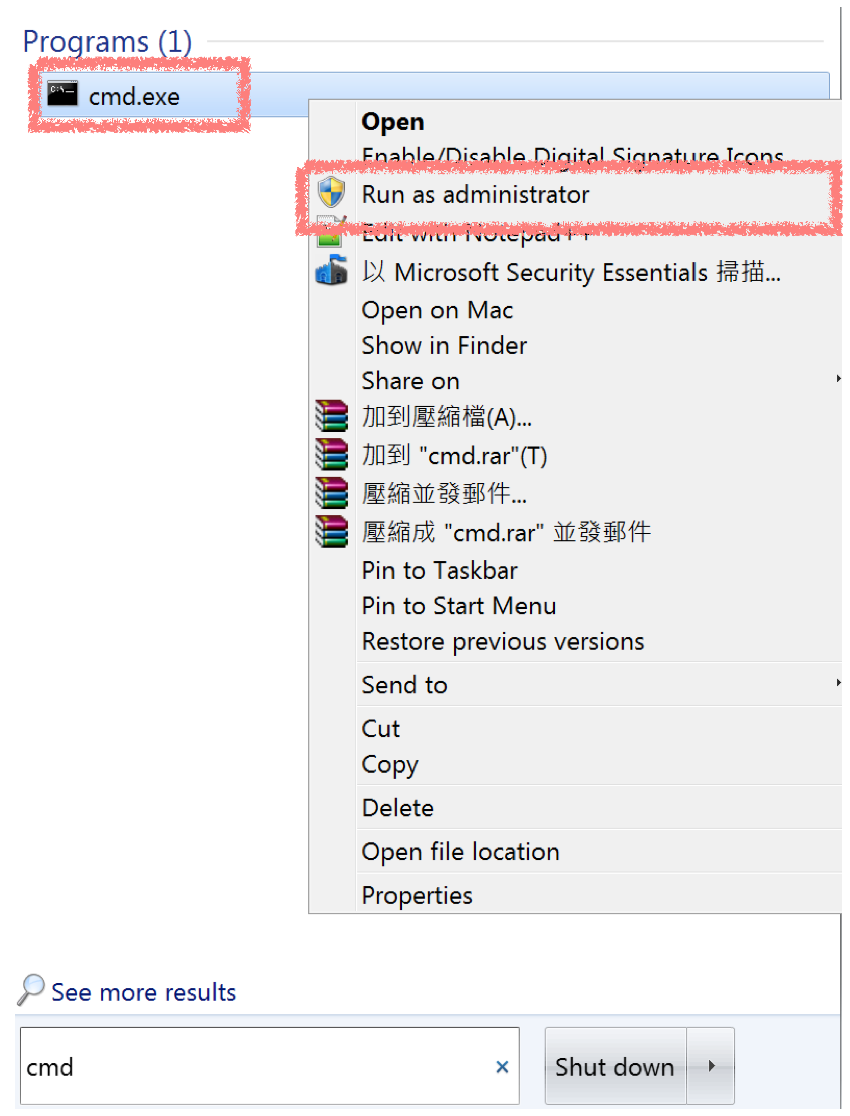
Run the CMD.ext as Administrator and change the direction to the folder of C:\Apache24\bin
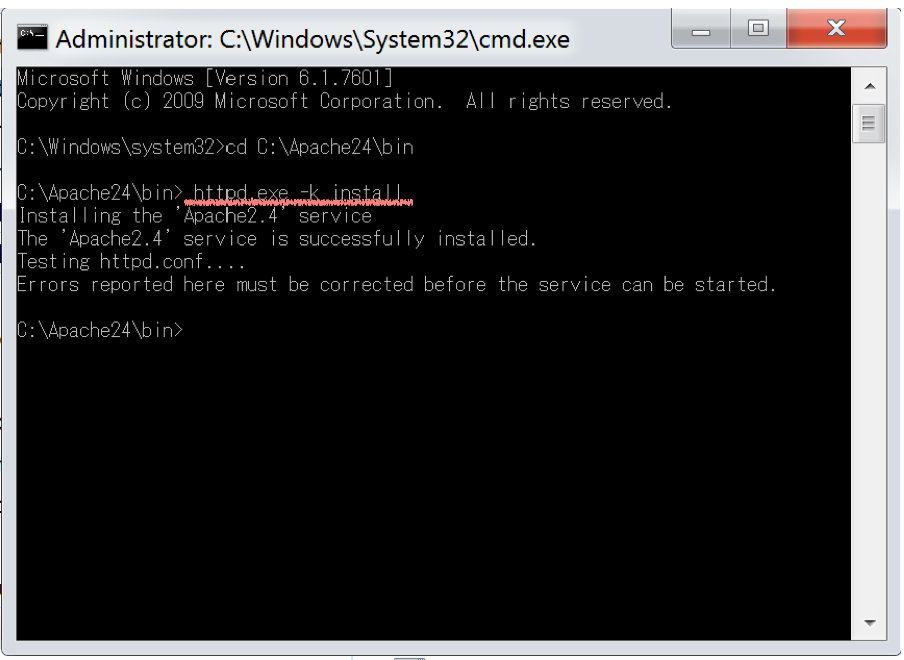
enter image description here

Type in httpd.exe -k install

enter image description here

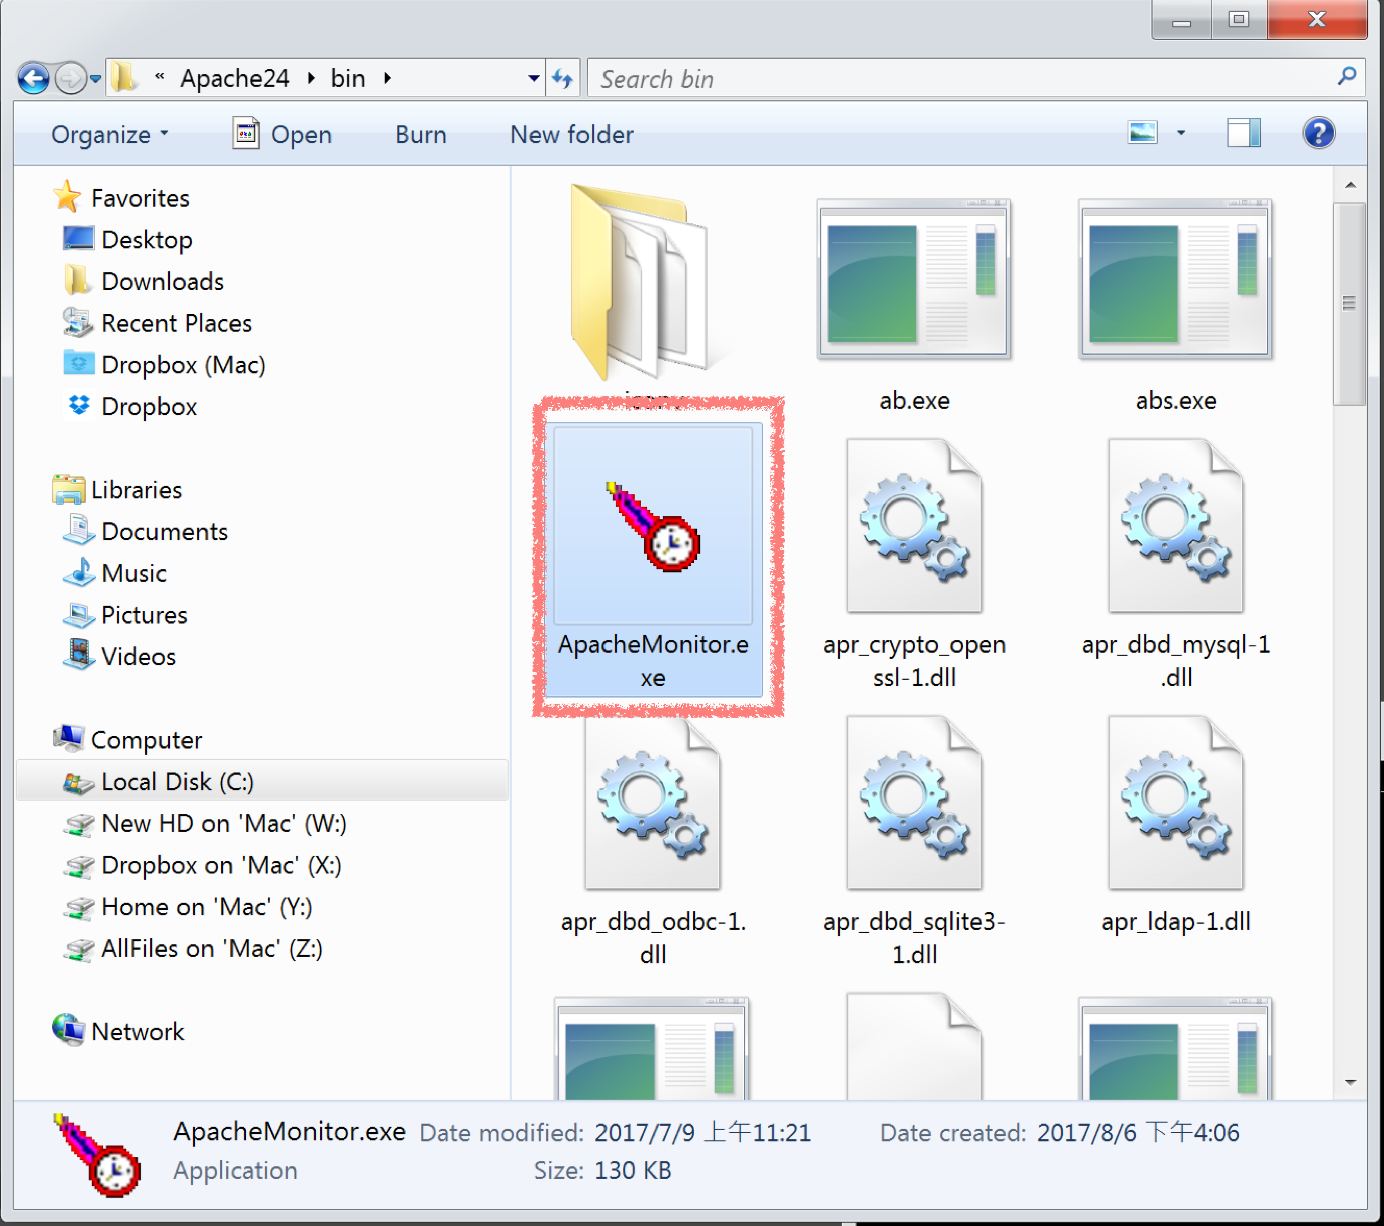
Go to the folder of C**:\Apache24\bin** and double click on ApacheMonitor.exe
enter image description here

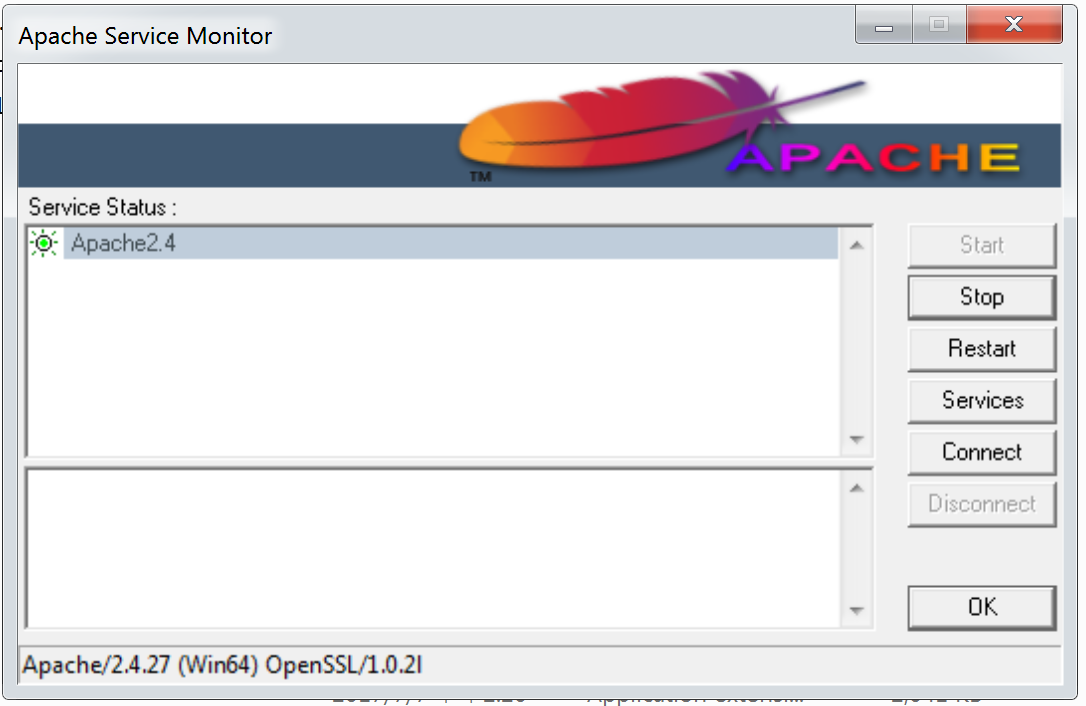
You can see the Apache 2.4 server with green light if the server has been started properly.
enter image description here

Type in localhost in your browser address. If the Apache works properly. You can see a web page displayed in your browser.

enter image description here

This is the first step to start up your own website with Apache!


Uninstall
Type in these code with the administration mode of CMD.exe under the folder of C:\Apache24\bin`enter code here

httpd -k shutdown httpd -k stop httpd -k uninstall
TEST

code:

Comments

  1. Thank you so much for this nice information. Hope so many people will get aware of this and useful as well. And please keep update like this.

    Text Analytics Tool

    Data Analytics Solutions

    ReplyDelete
  2. Thank you for your post. This is excellent information. It is amazing and wonderful to visit your site.
    best event management in chennai
    event management services in chennai

    ReplyDelete

Post a Comment

Popular posts from this blog

Arduino CNC shield control Stepper motor with DRV8825

CNC shield is quite useful for stepper motor driving. Here, I demonstrated how to use simple arduino code to drive stepper motor with DRV8825. First, just simply mount CNC shield onto Arduino Uno. Make sure the direction of the shield was right, where both the USB port and power supply wire was on your left hand site. The blue wire is my power supply which can be connect to 12-36V of power source. Next step you can mount the DRV8825 chip onto the CNC shield. Make sure the DRV8825 chip goes like this direction. If you put the chip in the wrong direction, you will probably damage it. By adjusting the jumber underneath the DRV8825 chip, motors can be driven with different kind of microstepping mode. I put three number here so it means that I set it into 1/32 step driving mode. Which is the most precise  one of DRV8825. The motor can connect to the right site of the DRV8825. Plug in the usb to your computer and upload these coded which will generate ste

Connect Arduino Wemos D1 ESP8266 to Internet/Wi-Fi Router

Connect ESP8266 to Wi-Fi Router Upload these code to your Arduino WeMos D1 ESP8266 W-Fi board. #include <ESP8266WiFi.h> //SSID of your network char ssid[] = " myRouter"; //SSID of your Wi-Fi router char pass[] = " myPassWord"; //Password of your Wi-Fi router void setup() {   Serial.begin(115200);   delay(10);   // Connect to Wi-Fi network   Serial.println();   Serial.println();   Serial.print("Connecting to...");   Serial.println(ssid);   WiFi.begin(ssid, pass);   while ( WiFi.status() != WL_CONNECTED) {     delay(500);     Serial.print(".");   }   Serial.println("");   Serial.println("Wi-Fi connected successfully"); } void loop ( ) {} Using ESP8266 to connect to Wi-Fi need to use the function of: WiFi.begin(ssid, pass); // connect to target Wi-Fi SSID is the name of the Wi-Fi you want to connect to.  while ( WiFi.status() != WL_CONN

Setting up CUDA 10.0 for mxnet on Google Colaboratory

Preface Recently, I was trying to train model on Google Colaboratory with mxnet. However, I found the CUDA version pre-installed on the Colab. is 10.2. Till now, mxnet only support to CUDA 10.1 Therefore, I started to think about if it is possible to setup the environment that mxnet has support. Till now CUDA 10.1 doesn’t work for me. But I do successfully installed CUDA 10.0. Also tried to trained a LeNet on Colaboratory. Since I am a mac user, NVIDIA GPU is always what we are jealous and envy. Until I found Google Colaboratory…. I’d like to share my journey with you, if you also encounter some problem on setting up environment. Google Colaboratory provide free access to the NVIDIA Tesla K80 GPU (24GB RAM, 4992 CUDA core) . It is a great gift for most of people who is eager to learn deep learning but doesn’t have good hardware systems to train deeper models. NVIDIA Tesla K80 GPU I assume that you already have background knowledge of Python and familiar with tools like jup